Tuesday, August 3, 2010

Asbestos Identifaction

Well I may joke about having a home made of Fibro but when I get a timely reminder of what the FIBRO in "fibro majestic" really means, 'DANGER'. I feel it is also timely to remind my followers of the same.


I found this printed on the rear of a loose piece of the fibro that was covering a hole in the wall. I am already aware of the presence of asbestos in fibro cladding but finding evidence of asbestos in your home is not always as obvious as this. I have added a link to the NSW governments information service about asbestos there are also some useful link in the Google adds attached to this posting giving information about identifying, testing and managing asbestos.


Thursday, July 29, 2010

Warming the sole

The week before last I spoke about the ease of installing an underfloor heating system on my 2UE radio gig. I put one down in my bathroom renovation last year and I am really enjoying the benefits of it during these cold winter months.

The system I put in is an "undertile" heater from warmtech. The heating wire is embedded in the sand cement screed below the tiles.


Installation.

The kit comes with all the necessary items in a small box with full installation instructions. Included in the box are items to assist with the installation as well as the actual heating element, a tester and a timer unit. It is important that a floor plan, including all dimensions of your bathroom is sent to the Warmtech people in order for the correct length heating wire to be sent to you as this wire’s length can not be adjusted.
 
The heating wire is simply installed directly over the floor membrane before a sand cement screed is laid for tiling. It’s an element and remains embedded in the screed working much like an electric blanket to warm the floor from below.

Measure the correct spacing for the wire and mark out a series of parallel lines on the floor. Then, starting at the point prepared by your electrician, work your way around the marked out grid laying and taping the wire along the lines, arcing at each end and doubling back until the entire length of wire is positioned. The starting end of the wire is pulled up to the switch position with the aid of a draw wire.

Once the wire is laid the sand cement under tile screed can be poured straight over it but I found that mixing a batch of floor leveling compound and pouring that over the wire not only embedded the wire but provided a protective layer that could be walked on whilst the screed is worked to form the fall into the floor waste.


****The heating element for this bathroom of 2.4 x 2.4metres draws just 400 watts whilst running, by setting the timer to operate for a few hours only in the morning and the again in the evening the system operates very efficiently.

Tuesday, July 27, 2010

Pie in the Sky.

With the cloud kitchen looking and working so well, the cold weather setting in, a certain very popular cooking show on the TV almost every night I have been feeling more inspired to cook than renovate. Cooking in a kitchen full of light, clouds and rainbows......well I could be making Pie in the Sky. The menu recently has included home made pizza (of course), roasted pumpkin, feta and semi-dried tomatoes being very popular amongst the vegos, whilst I am more inclined to the Sicilian salami, goats cheese, capsicum and black olives myself. Some slightly more sophisticated choices on the special board include
  • Smoked salmon and goats cheese quiche
  • Roast Lamb feast with 8 vegetables
  • Spanish garlic prawns with saffron and a dish of chickpeas and English spinach
  • Salmon and caper fettuccine with asparagus and reggiano salad
  • Black Mussels in white wine and dill
  • Italian beef casserole with polenta dumplings and fresh pesto, served with Parmesan crusted garlic bread.
For Sweets how does a slice of Lemon tart sound or perhaps some millionaire's shortbread.


Bon appetite  

Thursday, July 22, 2010

Tool Tip

 
IS YOUR SQUARE SQUARE AND YOUR LEVEL LEVEL?
Spirit levels and setsquares are certainly very handy and important tools around the house and shed, insuring your work is straight and accurate. But how can you be sure of the accuracy of these tools?  

To test if your level is still giving you an accurately reading place it against a wall and draw a line along the top edge. Turn the level end for end and place it against the line you have drawn. If the reading matches the line on the wall the tool is accurate, if not it may need adjusting or replacement. Testing a square uses the same principle, place it against the edge of a straight board and draw a line then flip it over and check if the blade matches the line.

Wednesday, July 21, 2010

My Oasis

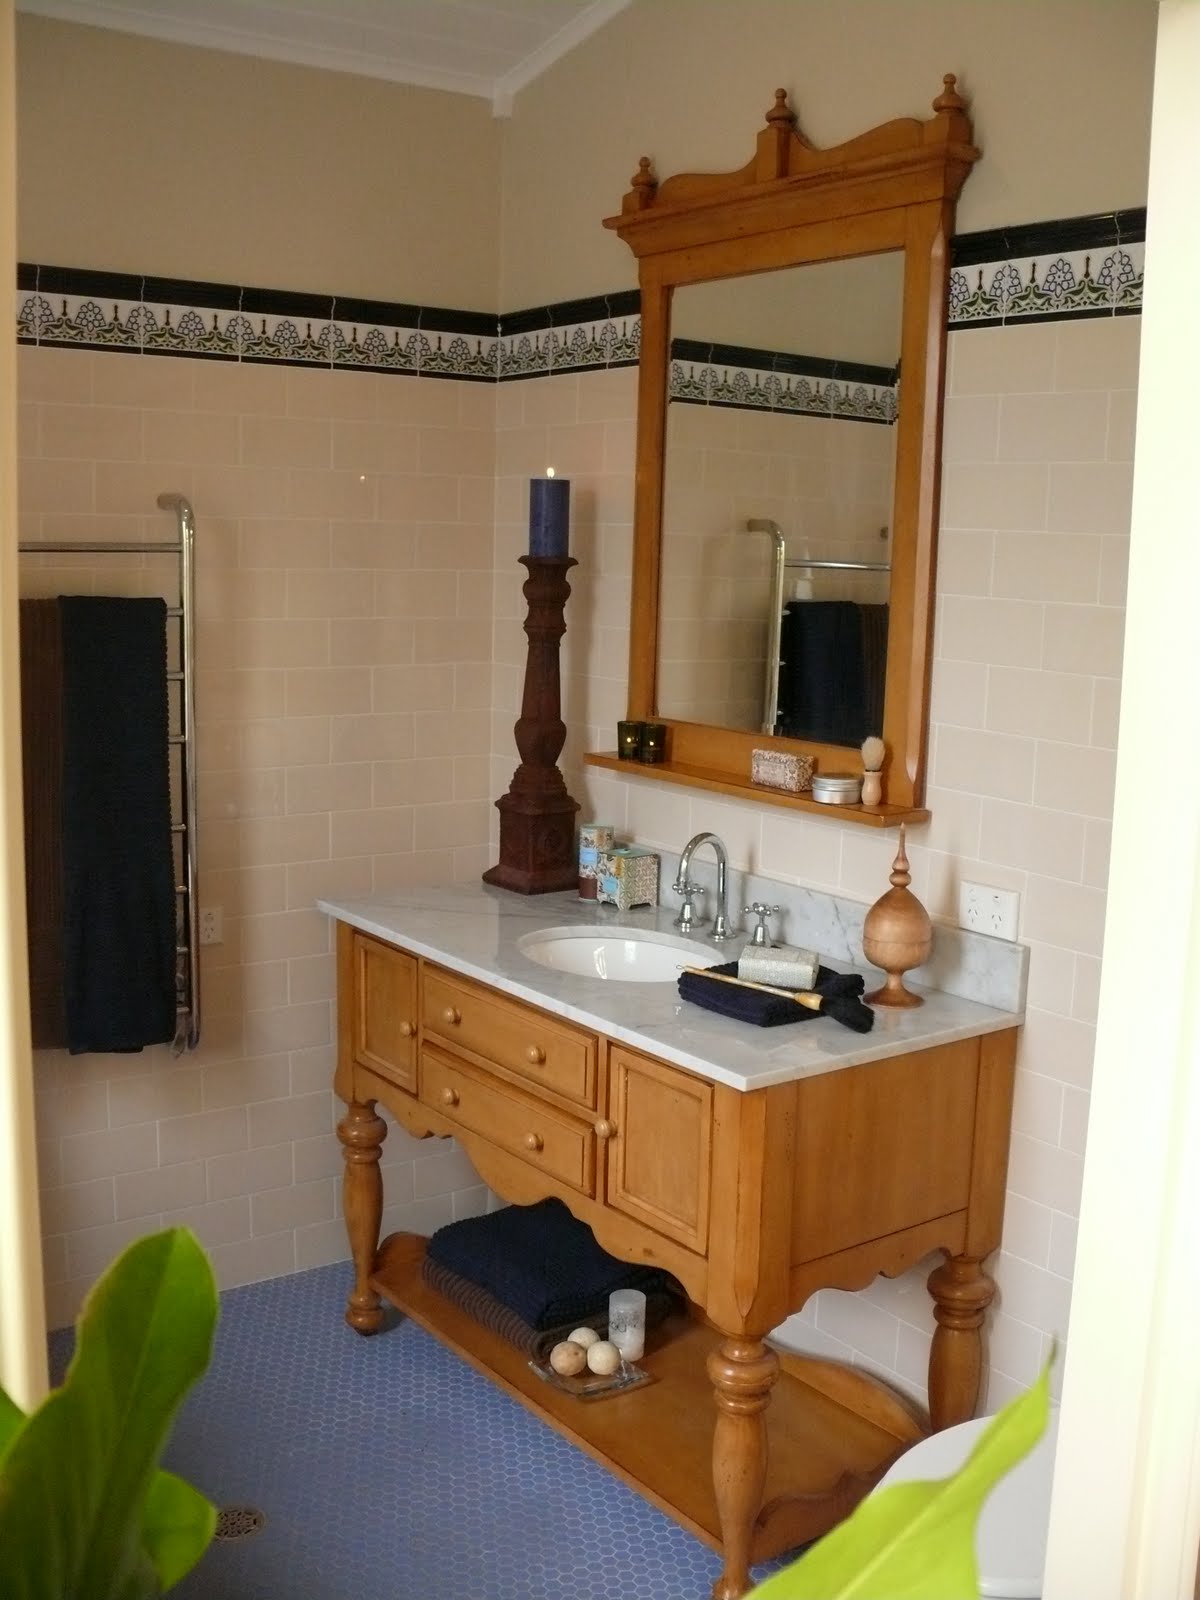
Bathroom renovation.


When my 100yr old house was purchased it was totally unrenovated and whilst most living spaces could be utilised as they were (at least for the meantime) the bathroom was a total disaster area that had to be tackled immediately.
My design philosophy was to create a traditional styled bathroom, in keeping with the era of the home, with a touch of the exotic and all the mod cons of a modern bathroom space.

Before (Arrhhh)
Bathrooms, along with kitchens, are usually the most expensive of rooms to renovate but by combining some ‘do it yourself’ with some ‘do it for me’ and some carefully bargain shopping thousands of dollars were saved. DIY or call in a tradie?


Stay tuned for details of what was done and how I did it.

Tuesday, July 20, 2010

More Kitchen Repairs.


Ok, ok, so I am not talking about the kitchen in the Fibro Majestic today but sharing more of those ideas I spoke about on the radio segment last week. There is some shots below of a kitchen I did makeover on in a weekend for my mum a year or so ago, it is all done with paint and new handles, it cost just a couple hundred dollars but it helped her sell her house for a better price in a difficult market.


Kitchen revival

On my radio segment last Friday I mentioned 5 quick fixes to give your kitchen a fresh new look without the expense of a complete replacement. The 5 ideas listed below are only recommended however if your cabinets are still sound otherwise you may be wasting time and money and a replacement kitchen may still be the best option.

  • Replace or repaint cupboard doors and draw faces.
  • Replace knobs and handles and taps. 
  • Resurface or replace benchtops. 
  • Retile the splashback, or cover it with a new glass one.
  • Lay cushion backed vinyl flooring over existing floor
 
Today I wanted to speak about the first and second options of the list above as these are probably the easiest yet most effective of these ideas. 


If your old doors are in reasonable condition the more economical way to go is to simply repaint them. This is simply a mater of removing old handles and filling the holes, repairing any damage and replacing any loose edges before lighting sanding. Apply a primer and then giving the doors two coats of your desired topcoat. This option will work for both timber and melamine doors provided you select the correct primer. Ask your paint supplier to show the range of melamine and laminate primers on offer, for timber I recommend a shellac or oil based primer.

Even budget vinyl wrapped doors can be painted, prime them as above if the vinyl is still firmly adhered to the doors but if it has stated to lift around the edges, peel it of, you may require the aid of a hot air gun to soften adhesive if it proves to be stubborn.

Using quality oil-based enamel paint would be the best choice top coat as it will be tough and hardwearing, however modern acrylics are tough and washable so these would also suffice.

Completely replacing doors is an easy option for any kitchen built in the last 30 odd years because each door is likely to be mounted with concealed hinges. If this is the case each door can be removed from the cabinet and taken to a cabinetmaker’s workshop, select a colour for your new doors and select a style of protective edge band and have the cabinet maker produce facsimiles of your old doors using your selected colours. In the workshop they will also drill the special holes required to fit concealed hinges. Once your new doors are ready for collection all that remains for you to do is return them to their positions and fit a new set of handles. Expect to pay $25 to $65 per, average sized, door depending on the colour and edging selected. Add a further $10 for a pair on new hinges (recommended).

*note, if you’re dramatically changing door colour, cover and infill panels may also need replacing or painting.

Saturday, July 17, 2010

Handy in the Kitchen

Ok, I promised a little information on kitchen refurbishment so I’ll get the ball rolling with this little Q&A I wrote a few years ago, I have tweaked the wording a little bit to make it more relevant but the important information remains the same.


 Can you help me Darryl? You installed my lovely new kitchen a couple of years ago and it’s made cooking for my family such a pleasure that almost every meal has become like an episode of Masterchef, I’ve finally conquered some of recipes in my favorite cookbooks. My problem is though, the new cupboard doors don’t seem to line up properly anymore and the ones under the sink even rub together when I close them, how to I make my kitchen look like new again?


As a bit of a kitchen weekend warrior myself I love to get into the kitchen and whip up a bit of gourmet storm, the kids like to score me on flavor and presentation. But sometimes it’s not the knives and spatulas you’ll see me swinging in the corner but a screwdriver. You see many items around the kitchen require maintenance, whether it’s replacing the seal on the oven or fridge, cleaning out the filters of the range hood or replacing a tap washer and the kitchen cupboard doors are one of these items. About once a year I find I have to take a screw driver to the cupboard door hinges and fine-tune them in order to keep the doors all aligned. (At least I get top marks for presentation here).

Over time the cupboard doors tend to sag, especially the ones under the sink at my house, as they’re the ones that seem to be opened and closed the most to access the waste bin and cleaning products. Sometimes we tend lean our weight on the top of the doors a bit to reach into the cupboard and grab stuff. All this only tends to speed up sagging process causing doors to move out of alignment or even come into contact and scrape against each other. It’s annoying and inconvenient but the good news is that the doors are designed to be adjusted quickly and easily with nothing more than a screwdriver. Most kitchens built in the last 25 years or so have what we call concealed hinges. Typically these hinges have 4 adjusting screws, allowing you to make 3 basic adjustments, lateral (side to side), depth (in or out) and vertical (up or down).


This is image shows the door on the left and the cabinet on the right, all adjustment to a door are made where the hinge is mounted on the cabinet.
  1. Lateral. This screw adjustment allows the door to be moved side-to-side. 
  2. Vertical. The two top and bottom screws (see 4 also) allow for adjustment of the door in an up or down direction.  
  3. Depth. loosening this back screw allows the door to be moved in or out.

Some experimentation and re-adjusting may be necessary in order to obtain perfect alignment but you’ll soon get the hang of it. It is worth noting that many of these types of hinges are manufactured in Europe and may have posidrive screws in them, these aren’t quite compatible with your standard Phillips head screwdriver. You can buy pozidrive tips from your local hardware store for couple of bucks each, they will be identified with the letter PZ on the side, most common screws will take the size PZ#2.


Friday, July 16, 2010

Licenced to Drill

It's not just at the Fibro Majestic that I am wielding the power tools, in fact I find myself traveling all over Sydney and the Blue Mountains applying my knowledge and skills. Keep an eye out for my new business website www.licencedtodrill.com (coming soon) and my Licenced to Drill Facebook page . Clients call upon me to do all manor of special handyman type jobs and here are few  that I specialise in.

Kitchens.
Kitchens have been a keen area of interest for my clients of late. It may be installing a new flatpack kitchen or revamping the kitchen you already have, I can help with either.
When it comes to installing flat pack kitchens I have installed a number of systems over the years, Flatpax (from Bunnings), Readikits (from Laminex) and my favorite IKEA. Easy, I measure (and assist with the design), you buy, I install.
If replacing the kitchen is not within the budget, how about refurbishing the one you have with new cupboard doors, fresh handles, a replacement bench-top, a new splash back or even one of the great new vinyls laid over the old floor.

Picture and mirror hanging.
The correct positioning and hanging of pictures and mirrors around the home is is very important aspect of decorating but it is not necessarily a simple as it may seem. This is a field in which I have 20 odds years of experience. Book me for a consultation and picture hanging session.

Handmade Furniture.
Furniture, shelving, storage......? whatever you need. I am particularly keen on making special pieces for your children. Each month I contribute handmade furniture pieces to handyman magazine, here is just one example indoor/outdoor table and bench seats, contact me to discuss you needs.

AV
New television set-up, wall mounting, custom AV furniture and home theater set-ups.

Wednesday, July 7, 2010

Clouded House

The old kitchen at the Fibro Majestic will need replacing eventually but in the meantime (and until budget allows) some character, practicality and a touch of whimsy have been added with paint.

This room functions as both kitchen and dining room, two very important functions within my home, where the hearts, minds and bodies of family and friends are nourished. It's where we meet and talk about life’s ups and downs and where I sit and work from my laptop when the office is getting me down.

Preparation painting saw the walls coated in Dulux Hog Bristle and ceiling in Dulux Antique white USA, Windows and trim sanded, primed and top coated with satin enamel, also in Dulux Antique White USA. All the cupboards lightly sanded and painted with 2 coats of wash and wear acrylic in Dulux Seabrook.


Cloud Bank.

To add a unique sense of fun and interest to the kitchen I painted a cartoon style cloud design onto the wall cupboards to form an overhead “cloud bank.”


How To.

Cloud patterns can be painted on walls, ceilings or even old furniture for fun. This simple form is easy to paint even if you are not artistically competent, if you are unsure of your ability try painting some practice clouds on scrap board before proceeding.


Step 1

Rough out the shape of clouds with a piece of sea-sponge dipped and dabbed. Form cloud shapes with a flat base and fluffy towers above.


Step 2

Work the shape and add details with a paintbrush and piece of cheese cloth using dabbing and twisting actions.


Step 3

Create depth by adding shadow effects with a small brush dipped in grey paint. Using small, arced brush stokes from the base of the cloud up. After grey add more white as required evenly blending the grey and white edges together.


Wednesday, January 13, 2010

Reuben's Groovy Pad

Anyone would think we'd slackened off around here, not having updated for over a month, but quite to the contrary really. The basement slab was completed but no sooner had the concrete cured than I'd filled the space with all the boxes and spare building materials that had been cluttering up the livings spaces upstairs, so no workshop yet I'm afraid.


Having some room upstairs has allowed us to spread out a bit, Reuben's little bedroom has been all trimmed up and painted, finally he has a private space to hangout and its a lovely room with windows that face north and south. Unfortunately the bay window, facing north, will require a bit more work as is needs to be totally rebuilt, the other window had no architrave and nor did the inside of the doorway, the room also required skirting boards and scotia trim in all the corners, all these were done with pre-primed timber products to make painting easier. The floor we covered with Masonite panels, ready for future carpeting.

Painting pine paneling like this can prove problematic if you using acrylic paint as the tannins in the knots and sap lines will bleed out through the water based paint leaving brownish stains. To seal the boards before top coating we primed the paneling with a shellac based paint called B-I-N from Zinsser. We then used copious amounts of fillers to fill all the small gaps, cracks and holes in the cheap pine linings, before painting the room with two coats of my favorite white, "antique white USA" from Dulux.


images loading...
Shellac-Base Primer-Sealer
Ultimate Performance Primer-Sealer
  • For interior and spot exterior use
  • Greatest stain sealer
  • Seals knots and sap streaks
  • Seals pet, smoke and musty odors
  • Sticks to all surfaces without sanding
  • Lightning fast dry - recoat in 45 minutes

Thursday, December 3, 2009

You can never have to many clamps


"You can never have to many clamps" is a popular saying amongst woodworkers, but you can have too many vices, I say.

Seriously though, as a woodworker, I am in need of a decent workshop. It just won't do to be out in the weather working on saw horses and temporary work tables. Time has come to get my big old basement sorted. In my last posting I spoke of having my son and his friends demolish the makeshift benches and shelves already down there. Reason being we needed to strip out everything to clear the raw earth floor. Once the space was stripped clear I could look at starting again from the ground up.

.....and I literally mean from the ground up as the first job is to pour a concrete floor, this will involve some extra excavation, improved drainage and then a 100mm slab. At 10x6 metres we are talking 6 cubic metres, a job big enough to call in some professional quotes.

...and the winner is...Rick, from Conte Concreteing...a good honest bloke whose quote was about half of the highest one I received.

Friday, November 20, 2009

The Painting Party

The Painting Party & The Wrecking Party

Well, not really a painting party, that is not a renovation strategy I'd seriously recommend, but if you want to get some bulk undercoating done just take a few teens, give them some brushes, add music and stir. (Drop sheets essential).


If there is one job teenage boys love to do, it is smashing stuff up, so armed with gloves, wrecking bar, some "Rage Against the Machine" (and a little supervision of course) we got to work ripping out the old makeshift workshop in my basement. Once this is all cleared out a new concrete floor will go in and I'll open up a few windows. It's gunna make a great new workshop (as long as I can resist the temptation to but a pool table down there).

Thursday, November 5, 2009

A history of life.


A few weeks ago I visited the Blue Mountains Historical Society and ordered a search on "the Fibro Majestic," out of curiosity for one and because I was becoming suspicious that the place wasn't as old as the agent had advertised (1880's). To start with I don't think Fibro sheeting was used in this country until the early 20th century. Sure we mined asbestos as far back as 1880 but Wundlerlich didn't start manufacturing in Australia until 1916, and for a few years before that asbestos sheeting was imported.

Sure enough the search revealed that the land here was vacant until sometime between 1914-1916 at which time the house was built for a woman from Balmain, a year or so later she sold it to a woman from Annandale. A tourism property boom saw the value of the place reach a peak in the early 1920's that wasn't to be realised again for over 20 years, but there was the great depression and the small matter of a world war in those 20 years. As far as I can tell the house was bought by a local man in the early twenties, a painter and decorator, who lived here until the 1970's although his wife died young. The historical society records show he died a very old man and he is buried in the local cemetery. Interestingly my neighbour did a similar search and found a similar history, it looks as though 2 old widowers lived here door by door for decades.

The other interesting finding is the name of the place, the sign reading 'Benalla,' out the front bears the name this house has always had, probably named after Benalla in Victoria. For now, though, I'll be sticking with "The Fibro Majestic".

Friday, October 23, 2009

Paint it Red


Thinking about painting my lounge room red has got me...well...confused. Red is such a dramatic and emotional colour, a real statement and has a big personality to be living with. I did a "google" search on the subject and there are so many suggestions. An article in the New York Times advised against what they called Bordello reds; bright, glossy and leering. (http://www.nytimes.com/2008/05/01/garden/01room.html?_r=2&ref=garden&oref=slogin). Other articles suggest using red on the walls in more intimate spaces such as the bedroom and just sticking to red upholstery and decoration in main living spaces.


I've been looking at the Dulux website as I am leaning towards their designer silk range (http://www.dulux.com.au/colour/colour-gallery/hues-gallery/red). I have also been looking around the house for natural inspiration...now I'm really confused.

Monday, October 12, 2009

Open and Shut Case


I had my Dad to help out over the weekend so the timing was right to tackle a job that I would not have been able to handle easily on my own. Removing the big sliding windows at the back of the Fibro Majestic that look out over the deck and garden, replacing the rotting window sill, repairing the windows and getting everything working smoothly.

This was also a chance to demonstrate the Fein MultiMaster tool I discussed on my radio segment on Friday (http://www.fein.de/corp/au). First I used the tool with a thin universal blade attached to slip in between the window sash and the frame and cut the old nails. I then used a different blade to cut out much of the old window putty so I could clamp and glue the loose mortise and tenon joints without cracking the glass.

Whilst the glue was drying it was out with the old sill and a new one was cut and fitted. Back in with the fixed sashes at each end, some new beading and repairs to the rollers on the sliding sashes and in with these as well.

Hey whilst we were at it we even installed some weatherboards under the sill, I actually intend to work my way all around the place installing these to sill height, one section at a time.

Now the windows can be slid back, cafe style, to open the dining room to the outside world, just in time for summer. Sure I still have a bit of work to do to patch and paint the frames and the MultiMaster will be of assistance there, but even now it is a great improvement. I can see myself sitting here and reading the week end papers.